Setup guide
Setup guide: client accounts, SMPP credentials and delivery schemes
A client account is one SMPP/REST/HTTP integration in the sandbox: it owns its credentials, allowed IPs and delivery scheme. Create one per application, environment or test scenario, and its traffic goes through the SMSC simulator.
Connection parameters
What your SMPP client needs once the account exists.
| Parameter | Value |
|---|---|
| Host | Shown in the top bar of your panel |
| Port | 4444 (single port for all SMPP connections) |
| Protocol | SMPP v3.4 (interface_version 0x34); REST API and HTTP API are also available |
| Bind types | bind_transmitter, bind_receiver, bind_transceiver |
system_id / password | The Login and Password you create under SMPP Credentials |
| Source IP | Must be listed in the account's SMPP IP block |
| Sessions | One login and password per SMPP connection; each connection gets its own session |
Three steps take you from an empty panel to a connected client:
1. Create an account for a client
- 1
In the side menu, click on the “Accounts” section, then on the “Create an account” button
- 2
In the Account field, enter the name you have chosen for the client (use English characters, underscores and numbers)
- 3
In the Name field, enter the client's name. This field can be used to describe which reports will be generated or for whom
- 4
In the Phone field, enter the client's contact number in international format, while this field is for storing the phone - but in the future, notifications may come to this number
- 5
In the E-mail field, enter the contact e-mail address - will be used to send notifications related to the account
The fields “URL for send API SMS State” and “URL for send RestAPI SMS State” are used if you connect to the client via API or REST API. Links are inserted here, where SMS delivery reports will be sent to the client.
- 6
Click on the Save button
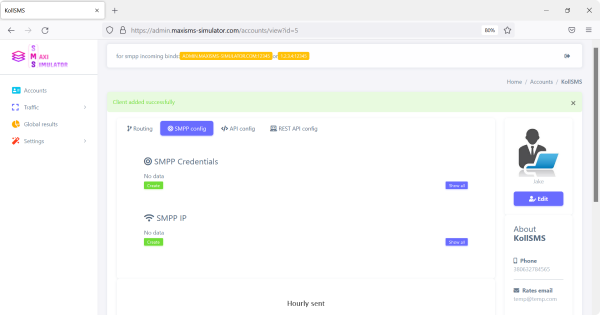
You will be redirected to the customer account setup page
The next configuration step is to create an SMPP account for the client and add an IP
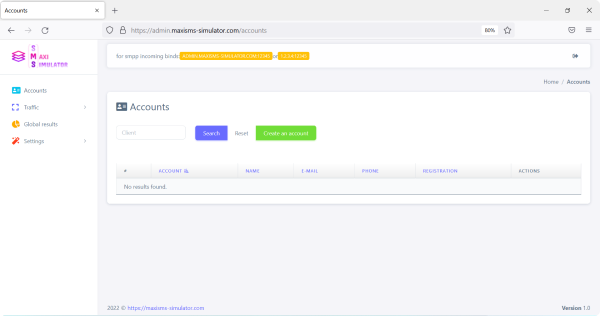 1
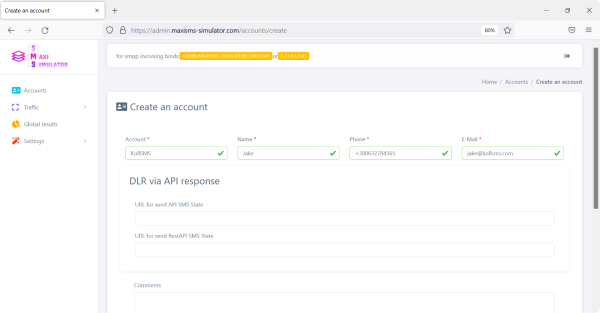 2345
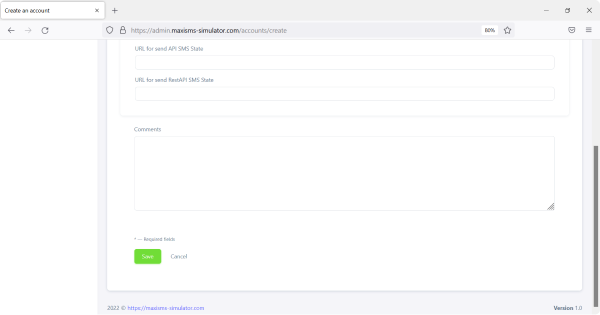 6
2. Add SMPP credentials and an IP
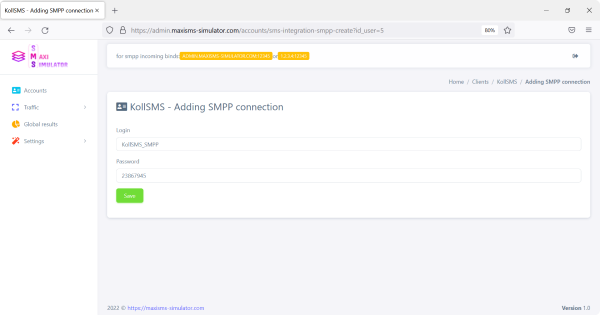
- 1
On the same page, go to the “SMPP config” section and click the Create button in the “SMPP Credentials” block
- 2
In the Login field, enter the login for the SMPP client account
- 3
In the Password field, enter the password for the SMPP client account
- 4
Click on the Save button
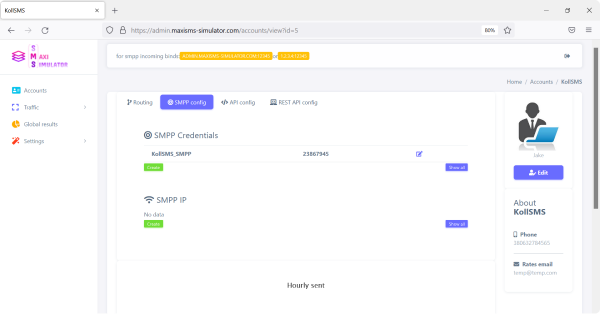
- 5
Return to the client account settings page, go to the “SMPP config” section and click the Create button in the “SMPP IP” block
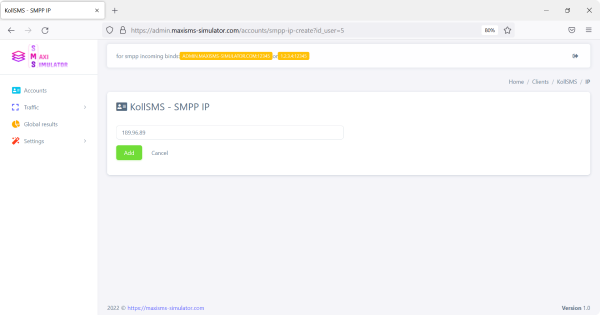
- 6
Enter the IP and click on the Add button
Your client can now bind to the sandbox over SMPP and send traffic
For each smpp connection that will connect to this account, you need to make a separate login and password, and of course, add all the IP addresses from which they will connect
The last step is a delivery scheme. It defines how many reports (as a percentage) come back as Delivered, Not Delivered, Expired, Pending or Rejected, and after what delay
 11
 234
 5
 66
3. Create a delivery-report scheme
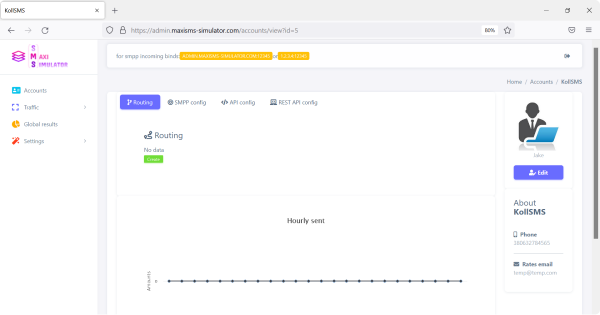
- 1
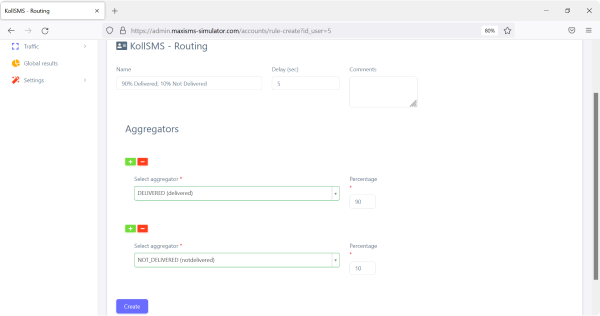
On the client account settings page, in the Routing section, click the Create button. Here you will create a so-called Rule, according to which all client traffic that passes through this account will be distributed
- 2
In the Name field, enter a name for the Scheme, which will help you quickly navigate. For example, “90% Delivered, 10% Not Delivered” or “Super Scheme”
- 3
In the Delay field, enter the number of seconds to wait before sending the report. That is, how many seconds should elapse between sending SMS and delivering the report
- 4
In the “Aggregators” block, you need to select the report statuses that will be valid in the scheme and their percentage. For example, if we want 90% of the reports to be returned with the Delivered status, and 10% of the reports with the Not Delivered status, then we need to select two corresponding aggregators. And opposite each, in the Percentage field, enter a percentage
- 5
Click on the Create button
Want to understand the receipt statuses first? Read the guide to SMPP delivery receipts.
 1
 23445
Panel tour
What else is in the web panel
The basic setup is done. These are the sections you will use every day.
Recipes
Delivery schemes for common test cases
The scheme belongs to the client account, so a simple pattern is one account per scenario.
| Test case | Delay | Aggregators |
|---|---|---|
| Happy path in CI | 1 s | 100% Delivered |
| Delivery failure and fallback | 1 s | 100% Not Delivered |
| Late report / resend timer | longer than your timer | 100% Delivered |
| Mixed traffic for statistics | 5 s | 90% Delivered, 10% Not Delivered |
More on these cases: simulating delivery failures and SMS tests in CI.
Ready to test your SMS traffic?
Get your SMPP sandbox in minutes and use it free for 3 days - or tell us what you are building and we will help you choose a plan.